The limitation with image gallery replications is that you can create a limited number of VMs from a replicated image (20 VMs per replicated VM as of December 2021), and if you want to create hundreds of VMs in a replicated region, then you have to consider an alternative to storing an image in another region using the Azure image builder.
A pooled host pool is nonpersistent, and we can store all user profile data to the remote storage. Additionally, you can have pooled hostpool image with all application/ configuration ready to deploy, so DR is not really required for a pooled host pool session host but definatly required for user profile storage and operating system image. You can simply create a new session host in the DR region using a pooled image, and it will come up with all the applications, FSLogix configuration inside new session host in DR region that will use the user profile from the fslogix cloud cache secondary location.
If you still want to protect your pooled session host from disaster, then you can use the Azure Recovery Services Vault (ASR) to protect the pooled session host, and you can fail over the session host during the disaster in a primary region. The following are the detailed steps to protect the session host as well as to fail over.
Creating a recover service vault in Azure is a one-time activity and can be part of your Azure Virtual Desktop deployment. You have to create a recovery vault in a secondary region to protect the session host from the primary region. Follow these steps to do this:
\ 1.\ Log in to the Azure portal and select the correct subscription. Search for recovery service vault on the top search bar in the Azure portal and click “Recovery Services vaults.” See Figure 10-11.

Figure 10-11. Recovery service vault search
\ 2.\ Click the Create button under the recovery service vault. See Figure 10-12.
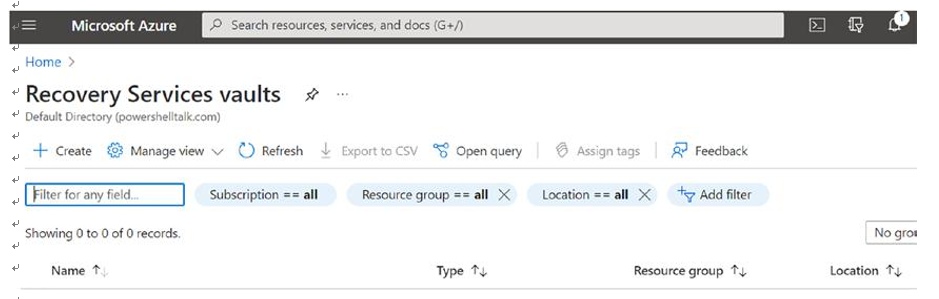
Figure 10-12. Creating the recovery service vault
\ 3.\ On the create recovery service vault page, fill in the mandatory details such as the subscription, resource group name, vault name, and region for vault creation. Make sure you select the secondary region to create the vault so that you can protect the session host from the primary region and the vault will be available during disaster in the primary region. See Figure 10-13.

Figure 10-13. Creating a recovery service vault, Basics tab
\ 4.\ Verify all the vault properties once the recovery service vault is created successfully.
Enabling replication/protection for AVD virtual machines is again a one-time activity at the time of Azure Virtual Desktop creation, but you might want to repeat it if you add additional session hosts of the host pool in your environment. You can automate the additional session host protection by using the PowerShell Az.RecoveryServices module. Follow these steps to protect the AVD session host using ASR:
\ 1.\ Open newly created recovery service vault, click + Enable Site Recovery, and fill in the source virtual machine details, source virtual machine location, and source VM resource group location.
See Figure 10-14.
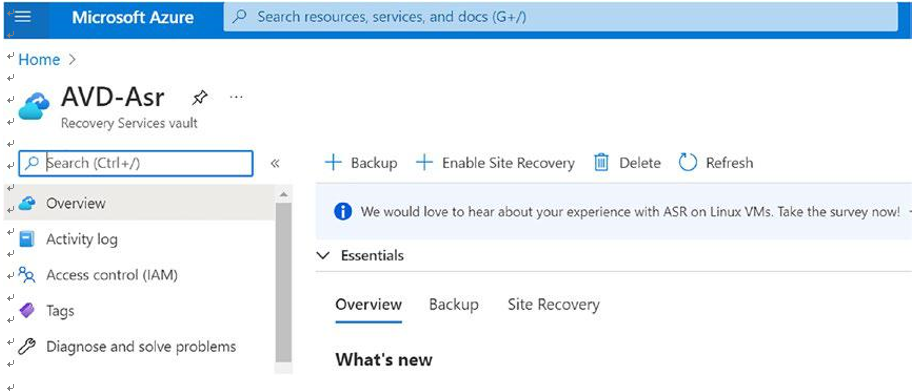
Figure 10-14. Recovery service vault, Overview tab
\ 2.\ Note that the recovery vault and the recovery vault resource group should be in the secondary region and select the correct source primary region while protecting the Azure Virtual Desktop session host. See Figure 10-15.

Figure 10-15. Recovery service vault, enabling replication
\ 3.\ Select the virtual machines we want to replicate. See Figure 10-16.
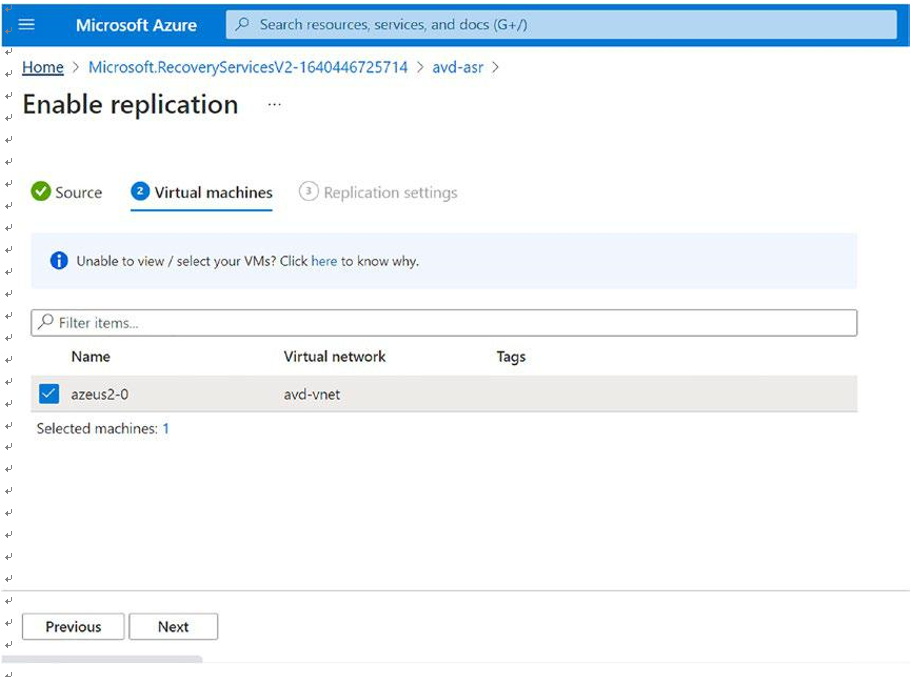
Figure 10-16. Recovery service vault, selecting the virtual machine
\ 4.\ Make sure you select the correct target region and subscription for the DR on the “Enable replication” tab. Also verify the target resource group, network, storage, and availability setting and click Customize in case you want to modify the target naming (DR region) settings. See Figure 10-17.
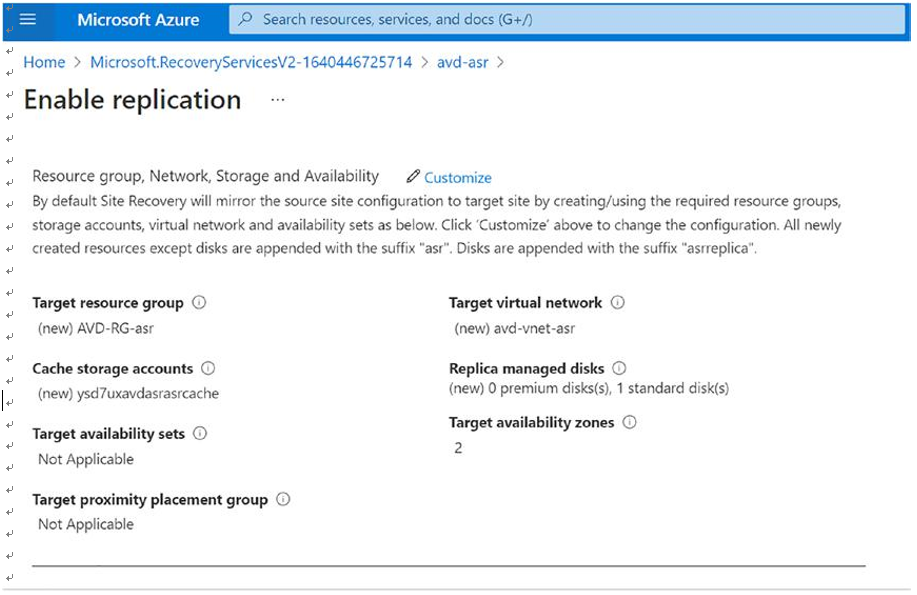
Figure 10-17. Recovery service vault, target resources
\ 5.\ Verify and modify the replication policy as per your needs. By default, recovery point retention will be 24 hours, and snapshot frequency will be 4 hours. See Figure 10-18.

Figure 10-18. Recovery service vault, replication policy
\ 6.\ Click “Enable replication” to start the replication of the selected virtual machines. Click the Notification icon (from the top bar) to monitor the enabling replication job status. See Figure 10-19.

Figure 10-19. Recovery service vault, site recovery job
\ 7.\ To check replication status of the virtual machines, go to the recovery service vault that was selected to enable replication and click the “Replicated items” tab. See Figure 10-20.

Figure 10-20. Recovery service vault, replicated items
\ 8.\ We can monitor the replication status of each virtual machine in the same blade. See Figure 10-21.
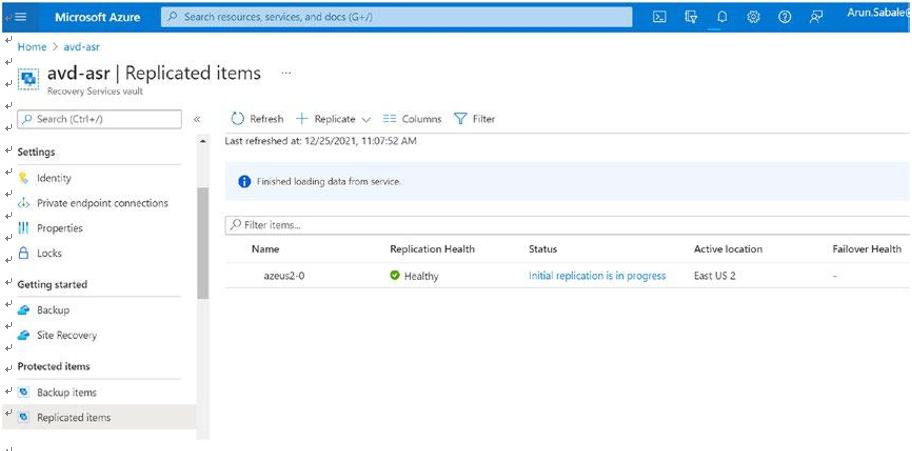
Figure 10-21. Recovery service vault, replicated items status
Adding virtual machines to the recovery service plan is a one-time activity to group multiple protected VMs/session hosts in the recovery plan so that you can fail over all the VMs together.
\ 1.\ Go to the Azure portal and select the recovery service vault we created for the Azure Virtual Desktop session host. Click the Recovery Plans tab. See Figure 10-22.
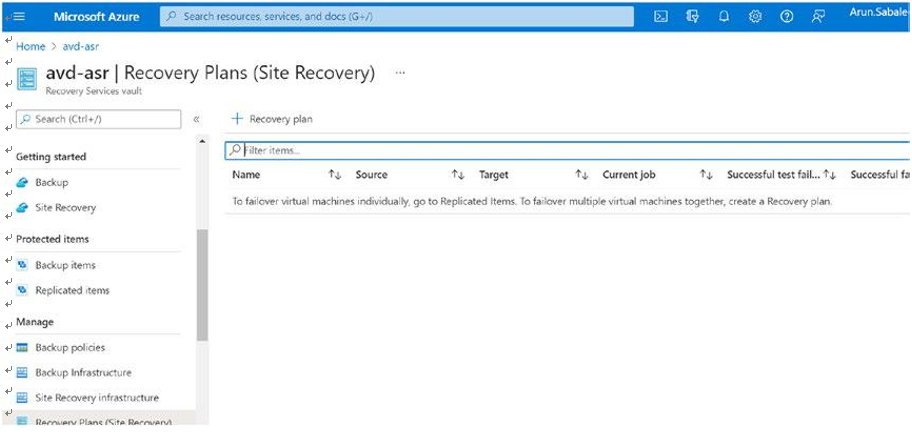
Figure 10-22. Recovery service vault, recovery plan
\ 2.\ Click “+ Recovery plan” to add a new recovery plan. Make sure you are selecting the correct source and target for the Azure Virtual Desktop session host DR. Select the protected VM in the recovery plan. You can add 100 protected VMs in the recovery plan (as of December 2021), so prepare the recovery plan accordingly. See Figure 10-23.
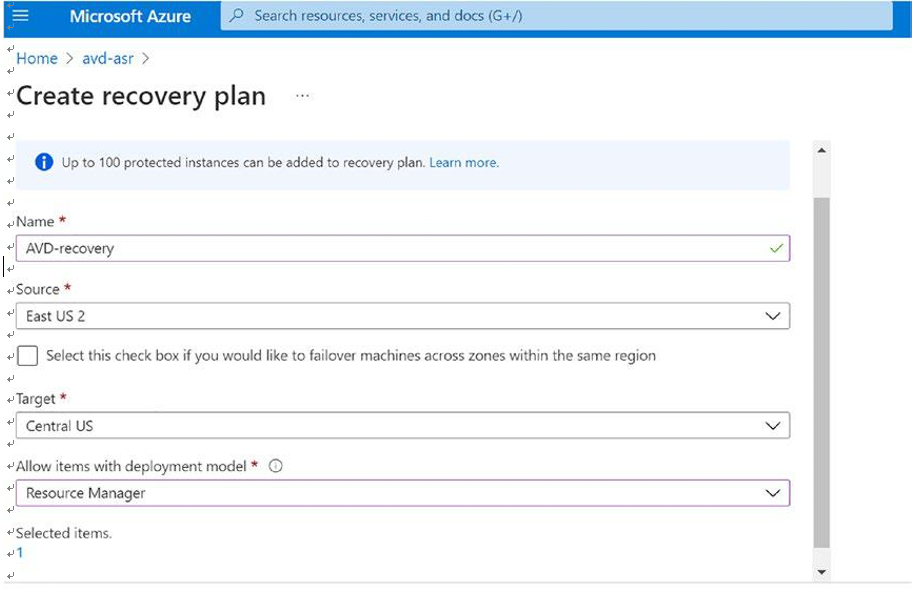
Figure 10-23. Recovery service vault, creating a recovery plan
\ 3.\ Click the Create button to create the recovery plan. Once the recovery plan is ready, verify the source session host is showing in the recovery plan. See Figure 10-24.
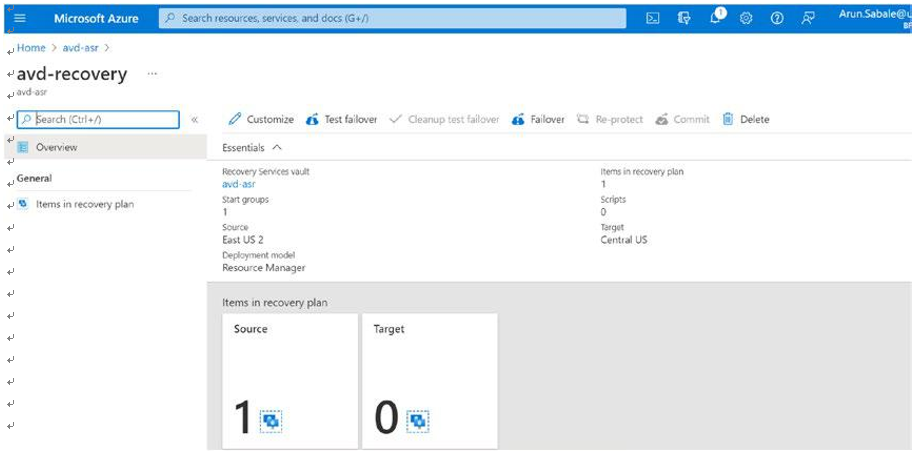
Figure 10-24. Recovery service vault, recovery plan overview