As we discussed, it’s mandatory to test the failover to make sure Azure Virtual Desktop is protected. Once you are done with testing the failover, you have to clean the test failover so that the primary region session host will be back in action. You can follow these steps to clean the test failover, and it will delete the test resources/VMs created in the secondary region.
\ 1.\ Log in to the Azure portal and go to the recovery vault where you performed the test failover. Select the recovery plan and click the “Cleanup test failover” option. See Figure 10-30.
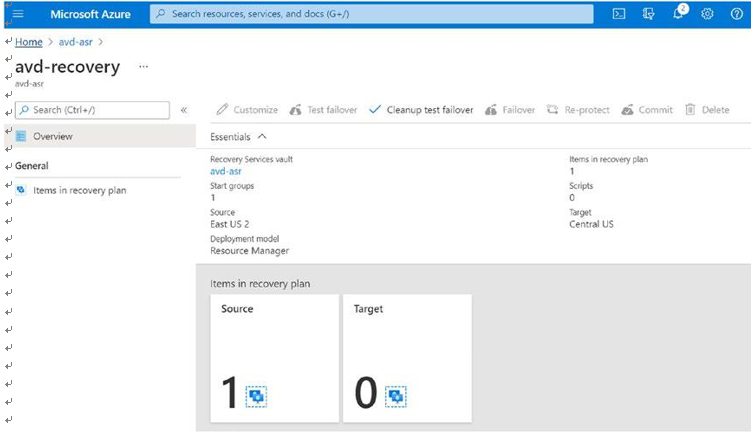
Figure 10-30. Test failover cleanup
\ 2.\ Wait until the cleanup is completed. See Figure 10-31.
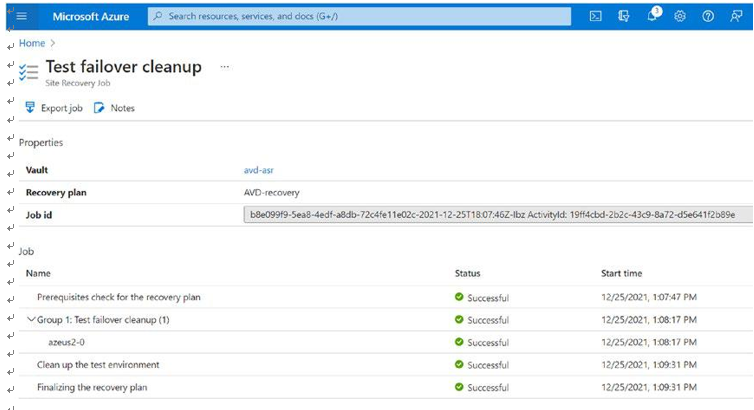
Figure 10-31. Test failover cleanup job status
These are the steps you need to perform during an actual disaster in the primary region:
\ 1.\ Log in to the Azure portal and go to the recovery vault. Click Recovery Plans (Site Recovery) under your recovery service vault. Next click the Failover menu item to fail over the session hosts from the recovery plan. See Figure 10-32.
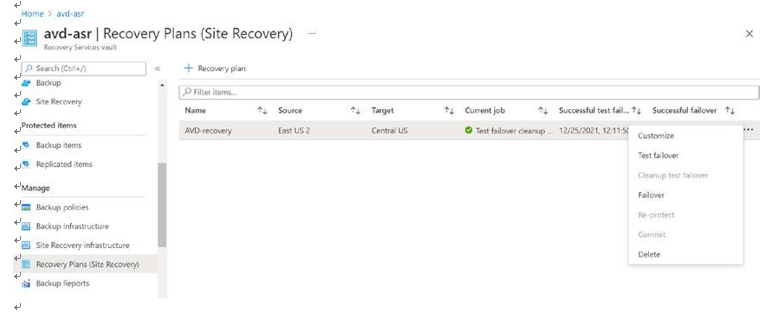
Figure 10-32. Failover, recovery plan
\ 2.\ Select “Latest processed (low RTO)” under Recovery Point, select “Shutdown machines before beginning failover,” and click OK. You can also change directions in case you have an active/protected VM in the secondary region and you want it to fail back to the primary. See Figure 10-33.
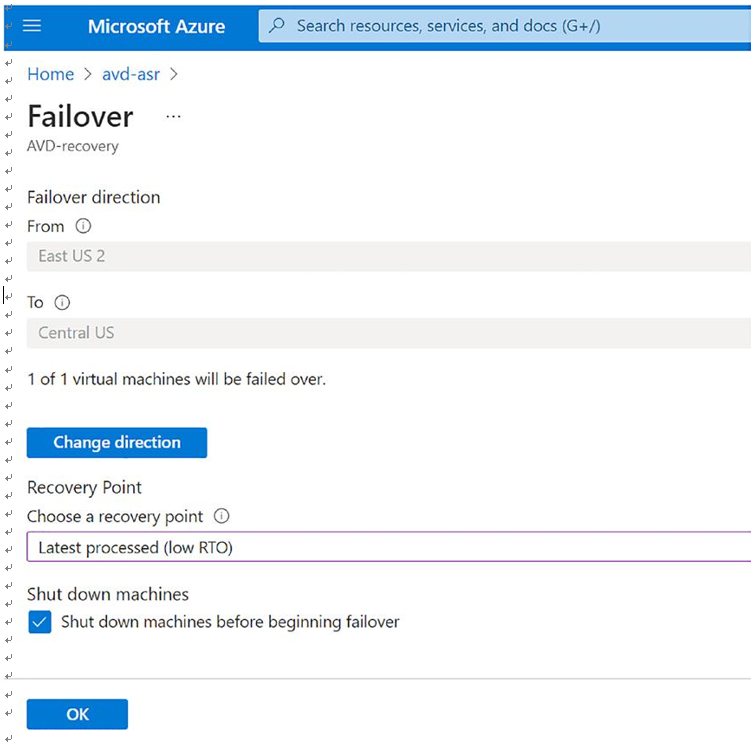
Figure 10-33. Failover, failover direction
\ 3.\ Click the notification icon on the top bar to monitor the failover job status and wait until Azure completes the failover job. See Figure 10-34.
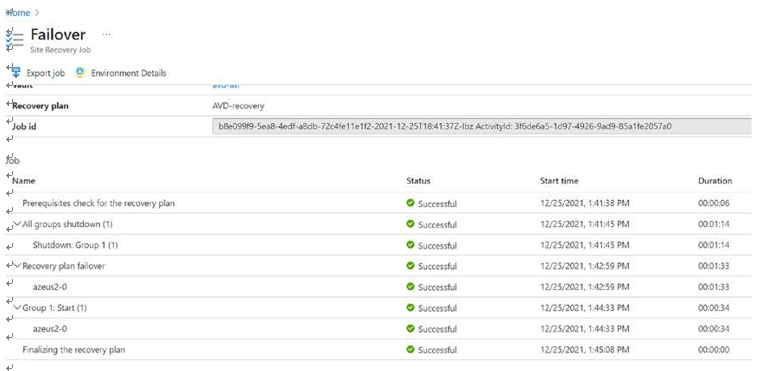
Figure 10-34. Failover, failover job status
\ 4.\ Now you can see new virtual machines running in the DR region and the primary region VMs deallocated. See Figure 10-35.
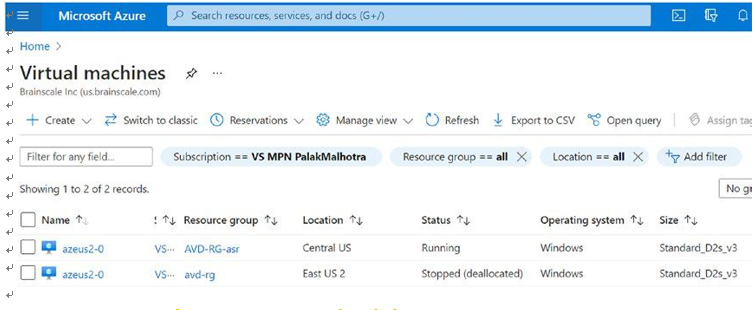
Figure 10-35. Failover, VM status after failover
\ 5.\ The next step is to make sure the remaining Azure Virtual Desktop–dependent resources are also available in the DR region so that the user can start logging in using the secondary region. The Azure control plane (gate, broker) is available in multiple regions and managed by Microsoft, so you don’t have to worry about that. If you are using the FSLogix cloud cache (required only for pooled), then you don’t need additional action to failover user profile storage, and once you fail over the session hosts, the user can access Azure Virtual Desktop from the DR region.
After the DR, you can fail back the session host to the primary region and protect the VMs again using ASR. When you fail over Azure VMs from one region to another using Azure Site Recovery, the VMs boot up in the secondary region, in an unprotected state. If you want to fail back the VMs to the primary region, do the following tasks:
\ 1.\ Reprotect the VMs in the secondary region so that they start to replicate to the primary region.
\ 2.\ After reprotection completes and the VMs are replicating, you can fail over from the secondary to primary region.
Let’s see the detailed steps:
\ 1.\ If you need to be fail back to the original primary region (in my case East US2) after DR, then click the Site Recovery tab under the recovery service vault and select the “Re-protect” option. See Figure 10-36.
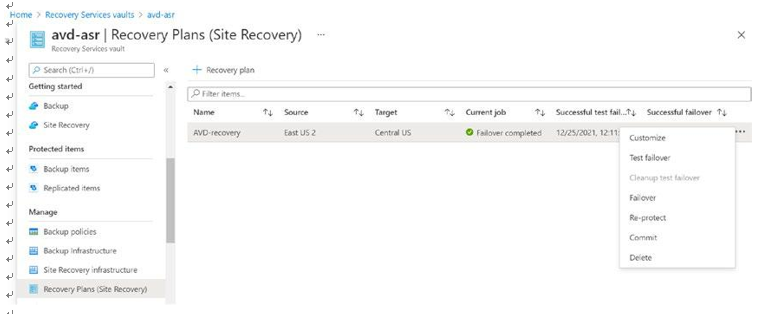
Figure 10-36. Failback to the original primary region
\ 2.\ Select all the correct details for the target (East US2 in my failback case) and click OK to re-protect the session host from the DR region to the original primary region. See Figure 10-37.
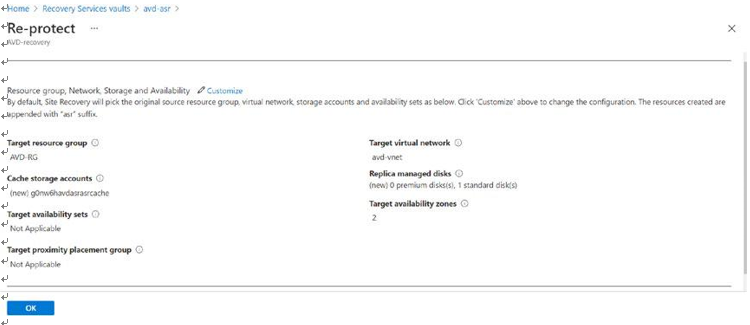
Figure 10-37. Failback, target resources
\ 3.\ You can check the re-protect job status from a notification. See Figure 10-38.
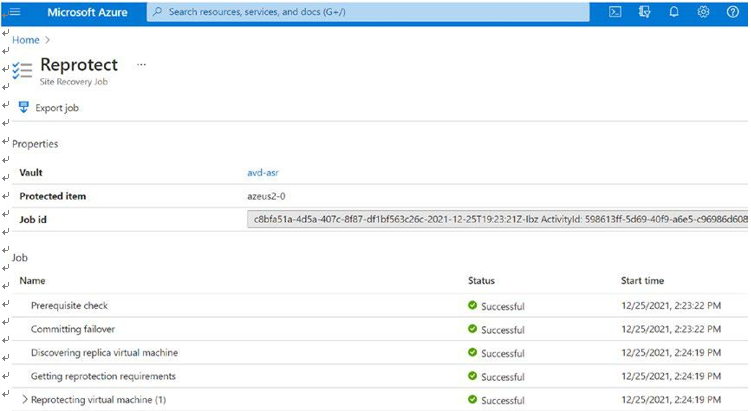
Figure 10-38. Failback, failback job status
\ 4.\ Once reprotection is completed, you can change the network setting of the protected VM and initiate failover from the DR region to the original primary region. See Figure 10-39.

Figure 10-39. Failback, failback direction
\ 5.\ Wait for the failover job to complete and check the running VM. See Figure 10-40.
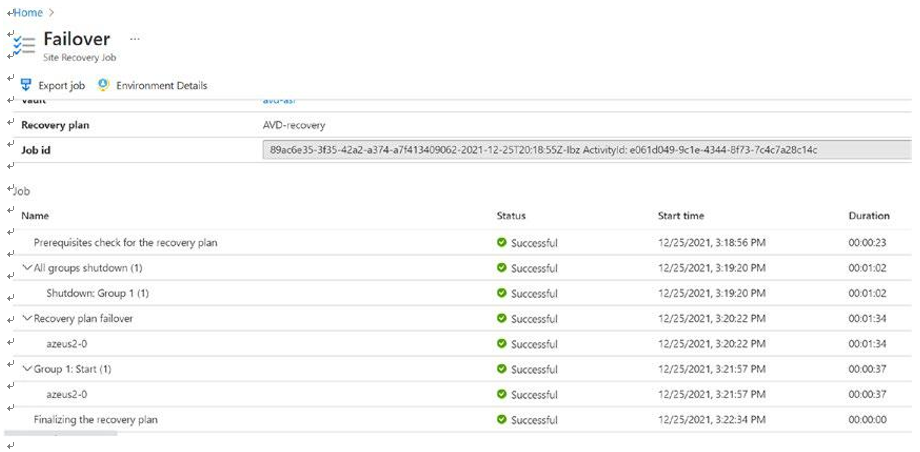
Figure 10-40. Failback, failback job status
\ 6.\ You can see the changes in the running VM. Now the original primary VM is running, and the DR will be deallocated. See Figure 10-41.
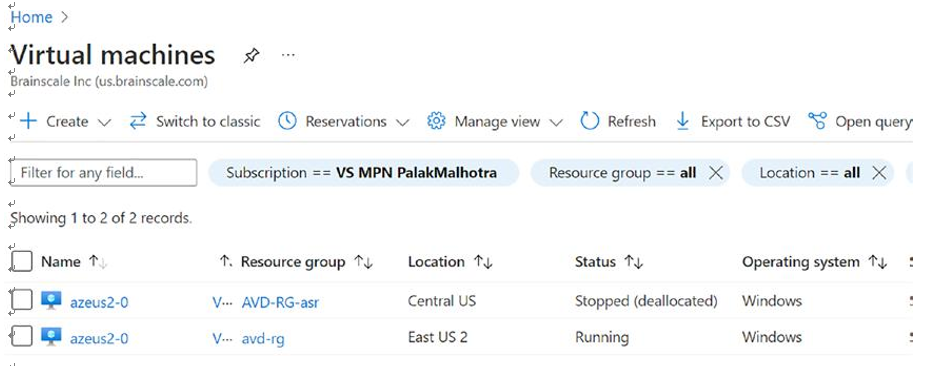
Figure 10-41. Failback, VM status after failback
\ 7.\ The VMs will be unprotected now, so reprotect the VM from the original to the DR region again. See Figure 10-42.
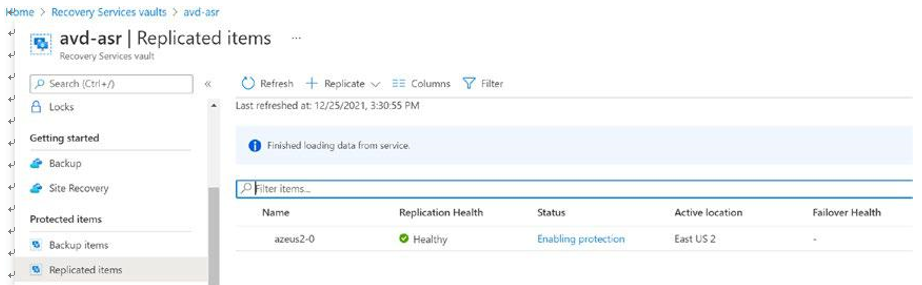
Figure 10-42. Failback, re-protect VM
What happens during reprotection? By default, the following occurs:
\ 1.\ A cache storage account is created in the original primary region where the failed over VM is running. If the target storage account (the original storage account in the primary region) doesn’t exist, a new one is created. The assigned storage account name is the name of the storage account used by the secondary VM, suffixed with asr.
\ 2.\ If your VM uses managed disks, replica managed disks are created in the primary region to store the data replicated from the secondary VM’s disks.
\ 3.\ Temporary replicas of the source disks (disks attached to the VMs in the secondary region) are created with the name ms-asr-<GUID>, which are used to transfer/read data. The temp disks let us utilize the complete bandwidth of the disk instead of only 16 precent bandwidth of the original disks (that are connected to the VM). The temp disks are deleted once the reprotection completes.
\ 4.\ If the target availability set doesn’t exist, a new one is created as part of the reprotect job if necessary. If you’ve customized the reprotection settings, then the selected set is used.
\ 5.\ MSIX package storage account DR: If you are using MSIX packages and if they are stored in Azure storage (standard/premium) or any other file share, then please refer to the “Azure File Share storage” section in this chapter to plan and implement DR for MSIX packages.
\ 6.\ On-premises connectivity and authentication: Make sure the ADDS service is available and reachable from the DR region as well so that if the primary is down, the VM authentication and name resolution will work with ADDS and DNS. Additionally, if you have some application needs on-premises connectivity, then you have to make sure that the same connectivity is there in the DR location with all the firewall rules.